Now please keep in mind that this is not the only way you can do rounded rectangles in cs2. Its just my preferred way and therefore how I chose to share it. My way is a bit longer than the other way but gives me more control over my final result as oppose to using the marquee tools.
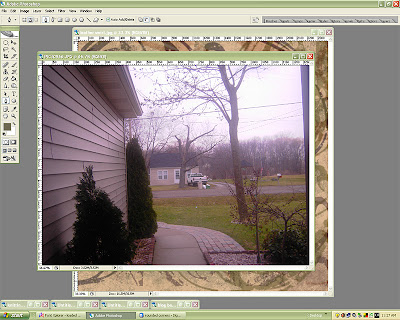
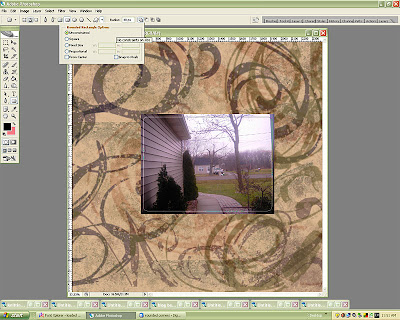
Ok in the above photo I have opened ps cs2 and have two images open. My background image and my photo that I will put rounded corners on.
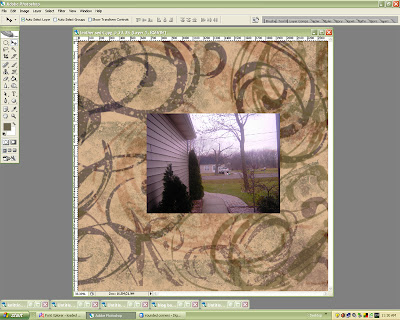
My next order of business is to drag my photo onto my background so go ahead and select your little arrow tool (I will assume you know which one I mean) and drag your photo onto your background. This will put your photo on its own layer and you can now close out your original photo layer.
This is what I have now. (Please keep in mind that my photo is much smaller than my background photo so that you can easily see both)
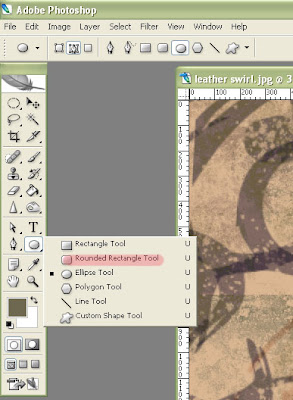
Now we need to select our rounded rectangle tool and give it the correct settings. So select your rounded rectangle tool which is highlighted in the below picture.
Great now lets give our tool the correct settings. In the picture below you will see that I have a few things pointed out. I have explained what they are in the picture itself. So go ahead and select those settings now. Please feel free to choose any radius number that you like. For purposes of this I chose a radius of 40 but you can choose whatever you like.
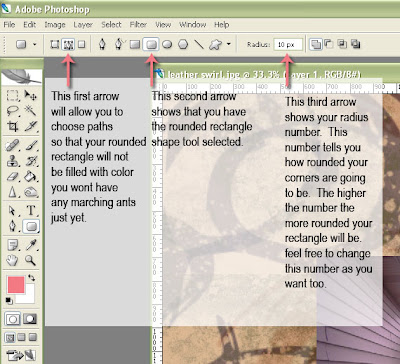
Below you can see my settings
Now go ahead and chose your paths palette and click on load path as a selection. See photo below.
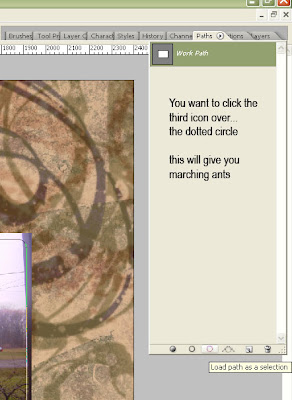
Now that you have done that you will have the marching ants but only around your photo. We dont want that because it would delete your photo so we want to inverse our marching ants so they are around our background and our photo. This means that if we were to delete any portion of our layer it would be what is between the ants. If your lost dont worry now is when the magic happens. Follow the instructions in the next photo and you will have your rounded corners on your photo.
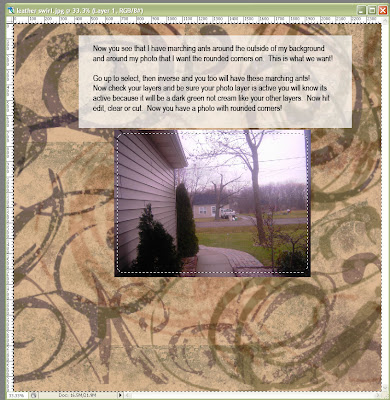
You will simply go to select>inverse (ctrl +shift+I) and your photo will match mine with marching ants surrounding both your background and your photo. Then be sure your photo layer is higlighted, then go to edit>cut or edit>clear.
You will simply go to select>inverse (ctrl +shift+I) and your photo will match mine with marching ants surrounding both your background and your photo. Then be sure your photo layer is higlighted, then go to edit>cut or edit>clear.
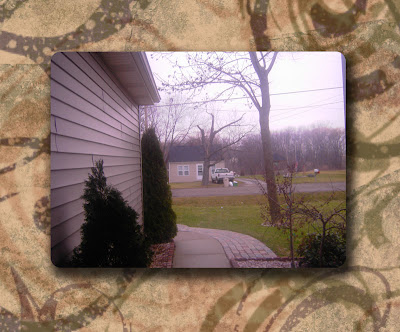
Here is my final result with a drop shadow added. How did you do???
Any questions or problems? Just drop me a line and I will answer you as I can.

5 comments:
Thanks so much. Very helpful!!
Oh, thank you so much. That is so helpful!
Hi thanks for this tutorial this is really great and easy.
Bart
Thank you very much. I look forward to more tips.
Newsballoon.com
Nice one, I always forget this so it's good to be reminded, cheers.
Post a Comment